Introduction:
Welcome to the Offline Private Shows (OPS) Notifications FAQ. This guide will help you set up and manage notifications, availability, and pricing for your private shows on CAM4. If you have questions about the process, this guide will provide clear, step-by-step instructions.
OPS Notifications Modal:
You’ll see a feature highlight modal when you log in after participating in an OPS. This modal introduces the new “Private Show Settings” area, where you can manage your OPS notifications and settings. You can access this area by clicking the “Get Started” button. The modal will stay visible until you complete the setup, change the notifications area, or dismiss it.
 |
 |
Private Show Settings Area:
The “Private Show Settings” area in the Broadcaster Dashboard allows you to:
- Make your OPS schedule visible.
- Adjust your OPS or Private Show pricing.
- Configure your notification channels.
This area is divided into three sections:
- Notifications: Set up your preferred notification channels.
- Private Show Availability: Define the days and times you’re available for OPS requests.
- Pricing: Adjust the pricing for your private shows.
Notifications:
The “Notifications” section in the “Private Show Settings” area is designed to ensure you never miss an OPS (Offline Private Show) request. This section allows you to configure how and where you receive notifications about OPS requests, ensuring you’re always informed when a viewer wants to connect with you, even offline.
Available Notification Channels:
-
Browser Notifications:
- Overview: Browser notifications are quick pop-ups on your screen, regardless of which website you’re on, as long as your browser is open.
- Enabling: To enable browser notifications, toggle the switch on the right side of the “Browser Notifications” option. If your browser has notifications disabled or blocked, an error message will appear, guiding you to enable them. Different browsers (e.g., Chrome, Firefox, Safari) have different settings for enabling notifications, and the system provides guidance specific to your browser.
- Mobile Browsers (iOS): For iOS users, browser notifications require additional steps. You must add the web app to your home screen and access it to enable notifications.
-
C4 Broadcaster Notifications:
- Overview: These notifications are sent through the C4 Broadcaster app and inform you about OPS requests directly on your mobile device.
- Enabling: Toggle the switch to activate notifications via the C4 Broadcaster app. When a notification is received, it appears similarly to a call, making it easy to respond quickly.
-
Email Notifications:
- Overview: Email notifications send you detailed information about OPS requests directly to your inbox, ensuring you have a record of the request.
- Enabling: Toggle the switch to enable email notifications. Ensure you have the correct email preferences in your account settings under “Emails & Notifications.” Specifically, the option “Receive notifications relating to your CAM4 account” must be enabled. If this setting is turned off, the system will notify you and provide a direct link to adjust your preferences.
-
SMS Notifications:
- Overview: SMS notifications send a text message to your mobile phone whenever an OPS request is made.
- Enabling: To activate SMS notifications, toggle the switch and ensure your phone number is correctly registered and validated. You can do this by adding a new number in the “Private Show Settings” area and following the validation steps provided.
- Two-Factor Authentication: Note that the phone number used for SMS notifications may also be used for SMS Two-Factor Authentication (2FA). If 2FA is enabled, you’ll be guided through the necessary steps to ensure your notifications are correctly configured.
Customizing Notifications:
-
Multiple Channels: You can enable one or more notification channels simultaneously. This lets you receive notifications through multiple methods, ensuring you’re always informed, regardless of your current activity or location.
-
Channel Conflicts: Some notification channels may be influenced by other account settings (e.g., email or SMS). These dependencies are marked with an info icon “ⓘ” next to the respective channel, alerting you to review and adjust related settings if necessary.
Troubleshooting Notifications:
-
Browser Issues: If you’re not receiving browser notifications, double-check your browser’s notification settings. Ensure notifications are allowed for the CAM4 site and the browser is not set to “Do Not Disturb” mode.
-
Email Deliverability: If you’re not receiving email notifications, verify that your email address is correct and that notifications aren’t being filtered into your spam or junk folder. Adjust your email filters to ensure that messages from CAM4 are always delivered to your inbox.
Best Practices:
-
Enable Multiple Channels: For maximum coverage, it is recommended that you enable more than one notification channel. This ensures that even if one channel fails, you’ll still receive notifications through another method.
-
Regularly Review Settings: Periodically review your notification settings, especially after changing your account or updating your mobile device or browser. This ensures that all channels remain active and properly configured.
-
Stay Informed: By configuring your notifications effectively, you can stay informed about OPS requests in real-time, helping you respond promptly and maintain strong engagement with your audience.
Private Show Availability:
The “Private Show Availability” section allows you to define when you can accept OPS requests from viewers. This is crucial for maximizing your engagement and ensuring that your fans know when to request a private show with you, even when you’re not actively online.
Configuring Availability:
-
Day Selection:
- You can select specific days when you are available for OPS requests. For example, you can be available only on weekdays, weekends, or any combination of days that suits your schedule.
-
Time Intervals:
- You can configure up to three-time intervals for each selected day. This allows you to break up your availability throughout the day. For instance, you might choose to be available in the morning, afternoon, and evening on a given day.
- To set a time interval, select the day, then choose a predefined option like “All day” or “Custom Time” to enter specific start and end times. Click “Add time slot” to include each interval.
-
Day Groups:
- You can group multiple days and apply the same time intervals to those days. For example, you could create a group for “Monday, Wednesday, and Friday” with one set of time intervals and another group for “Saturday and Sunday” with different time intervals.
- This feature is especially useful if you have a consistent availability pattern across multiple days.
-
Editing and Removing Availability:
- You can return to this section anytime to edit or remove your availability settings. Select the day or day group you want to modify, make changes, and click “Save” to update your settings.
- If you need to start over, you can remove all existing time intervals and day groups and create new ones from scratch.
Profile Visibility:

-
Once you’ve configured your availability, these settings will be displayed on your profile page under the “Detailed Bio” section. This ensures that viewers can easily see when you are available for OPS, increasing the likelihood of receiving requests during your preferred times.
-
For desktop users, this information appears on the left side of the profile page. For mobile users, it’s shown directly beneath the main profile information, ensuring visibility across all devices.
Messenger Integration:
-
Your configured availability is also integrated into the Messenger area. If a viewer attempts to send an OPS request offline and outside your set availability, the request button will be disabled. This helps manage expectations and ensures viewers know when you’re available for private shows.
-
Having your schedule prominently displayed on your profile and in the Messenger area enhances your connection with your audience, making it easier for them to plan their interactions with you.
Best Practices:
-
You should set your availability when you’re open to engaging with viewers but may not be actively online. This allows you to maximize your earnings by accepting OPS requests during off-peak hours.
-
Regularly updating your availability based on your schedule and viewer engagement trends can help optimize your OPS interactions and increase viewer satisfaction.
Pricing:
The “Pricing” section within the “Private Show Settings” area is where you can set and adjust the rates for your Offline Private Shows (OPS) and regular private shows. By carefully configuring your pricing options, you can cater to various viewer preferences, maximizing your appeal and earnings.
Setting Your Prices:
-
Understanding Pricing Structure:
- The “Pricing” section allows you to define different price points based on the duration of the private shows you offer. This flexibility enables you to accommodate short interactions and longer, more personalized sessions.
- You can set up multiple time blocks, each with its rate. This structure allows you to appeal to viewers who may only want a quick interaction or those looking for a more extended experience.
-
Configuring Time Blocks:
- Short Duration (e.g., 1 minute): This is ideal for quick interactions or for viewers who want a brief taste of what you offer without committing to a longer session.
- Medium Duration (e.g., 2-5 minutes): This is a popular choice for viewers who want a more meaningful interaction without a long-term commitment.
- Long Duration (e.g., 10+ minutes): This is perfect for dedicated fans who want to spend more time with you in a private setting. Offering a slight discount for longer sessions can encourage viewers to choose these options, increasing your overall earnings.
- To set a time block, select the desired duration, enter the corresponding price, and click “Save.” You can add multiple time blocks to cover various preferences.
-
Adjusting Prices:
- Prices can be adjusted at any time to reflect changes in demand, special promotions, or evolving preferences. It’s advisable to regularly review your pricing to ensure it remains competitive and aligned with the value you offer.
- If certain time blocks are more popular, consider adjusting those prices accordingly. For example, if demand is high, you might increase the price for shorter durations or offer discounts on longer sessions to encourage more extended interactions.
-
Best Practices for Pricing:
- Competitive Pricing: Research similar profiles and consider setting competitive prices that reflect the unique experience you provide. Avoid setting too low, as this might devalue your services, but ensure they’re not prohibitively high.
- Special Offers: Periodically offering discounts or promotions can attract new viewers and encourage repeat business. For instance, offering a discount on longer sessions during off-peak hours can help fill your schedule and boost your earnings.
- Transparency: Displaying your pricing on your profile and in the Private Show Settings area helps set clear expectations for viewers. Transparency builds trust and reduces the likelihood of misunderstandings or dissatisfaction.
-
Managing Viewer Expectations:
- Be clear about what each time block offers to avoid any confusion. If specific shows or activities require more time, ensure viewers know this upfront.
- You can include descriptions or notes in your profile or during interactions to communicate what pricing tiers cover, helping viewers choose the option that best suits their needs.
Impact on Earnings:
- By strategically setting your prices, you can create a pricing structure that appeals to a wide range of viewers while maximizing your earnings. Balancing affordability with value ensures you attract and retain viewers, leading to more consistent OPS requests.
- Remember that your pricing reflects the unique experience you offer. Adjusting it based on demand and viewer feedback can help you optimize your income while maintaining a loyal fan base.
Monitoring and Adjusting:
- After setting your prices, it’s important to monitor their performance. If you notice that certain price points are underperforming or that viewers frequently choose certain durations, adjust accordingly to better meet demand.
- Utilize any feedback from viewers to refine your pricing strategy. Regular adjustments can help you stay competitive and ensure your OPS offerings remain attractive to your audience.
Support for Pricing Adjustments:
- If you’re unsure how to set or adjust your prices or need assistance with the technical aspects of configuring the “Pricing” section, CAM4’s Customer Care Team is available to help. They can guide best practices, market trends, and technical troubleshooting to optimize your pricing strategy.
Conclusion:
The “Private Show Settings” area, including its key components—Notifications, Private Show Availability, and Pricing—offers a comprehensive suite of tools to enhance your OPS (Offline Private Shows) experience on CAM4. By taking the time to properly configure these settings, you ensure that your interactions with fans are seamless, timely, and tailored to your preferences.
Maximizing Your OPS Experience:
-
Notifications: By setting up multiple notification channels, you never miss an opportunity to engage with your audience. Whether you’re notified via browser, email, SMS, or the C4 Broadcaster app, these channels keep you connected, even offline. This ensures your fans can reach you at the right time, enhancing their experience and boosting your potential earnings.
-
Availability: Configuring your Private Show Availability allows you to manage your time effectively, ensuring that OPS requests align with your schedule. Displaying this availability on your profile and in the Messenger area provides clear communication to your viewers, helping them know exactly when you’re available for private interactions.
-
Pricing: Setting competitive and flexible pricing for your private shows ensures you cater to various viewer preferences. Offering multiple duration options makes your services accessible to a broader audience, increasing the likelihood of receiving OPS requests.
Staying Engaged and Responsive:
Effective use of these settings improves your interaction with viewers and fosters a sense of professionalism. Fans appreciate knowing when and how they can reach you, and the ability to respond promptly to OPS requests enhances their satisfaction and loyalty. Regular communication and availability build stronger relationships with your audience, leading to more consistent and higher earnings.
Continuous Improvement:
Remember, the features and tools in the “Private Show Settings” area are designed to evolve based on user feedback and technological advancements. It’s a good practice to regularly revisit this area to ensure your settings remain aligned with your goals and to take advantage of any new features that might enhance your OPS experience further.
Support and Further Assistance:
If you encounter any issues or have questions about configuring your settings, CAM4’s support team can always assist. Don’t hesitate to reach out if you need help troubleshooting notification issues, adjusting your availability, or fine-tuning your pricing strategy. The goal is to ensure you have all the tools and support you need to maximize your time on CAM4.
Final Thoughts:
By effectively utilizing the “Private Show Settings” area, you’re taking a proactive step toward optimizing your presence on CAM4. These tools help you manage your time and interactions more effectively and build a stronger connection with your audience. You can look forward to a more organized, responsive, and profitable OPS experience with the right settings.




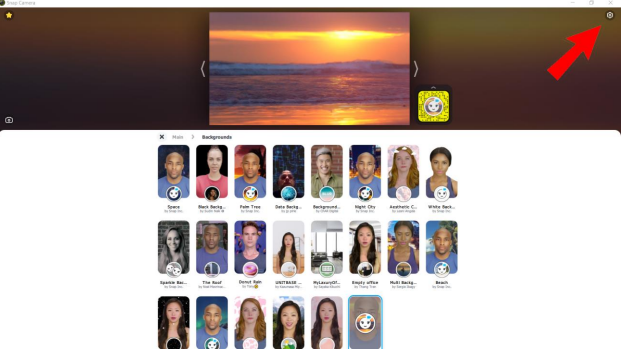
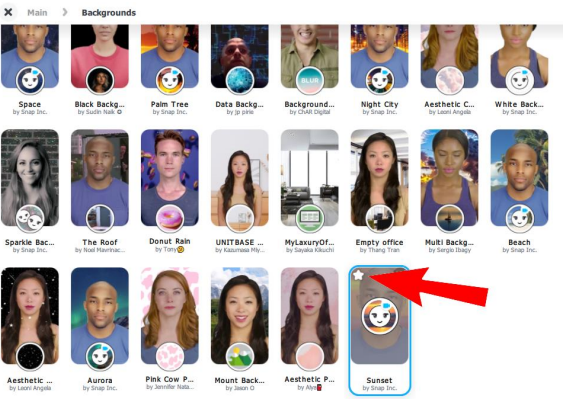

 Turn Lens On/Off – Toggles an active lens on or off
